x86 and x64 : which version of a debugger should I use ?
 Maybe this post will be the shorter ever of this blog, but I have to write something about it. Microsoft offer two version of their Debugging Tools: a x86 version, and a x64 version. Which one do you have to use?
On 32-bit OS, the answer is really simple: you don’t have the choice but to use the x86 version, as the OS will not be able to start a 64-bit executable. End of the decision tree :)
On 64-bits OS, it depends on what you want to debug. Unless you need to dig deep inside the Wow64 layers (and I never had to do that personally, but speaking about it makes me curious about what I can found), just use the x86 version to debug a 32-bits executable, and the x64 version to debug a 64-bits executable. If you mess up with this simple rule, you may encounter serious difficulties to get CLR information through SOS (well, it’s basically not possible as far as I know), have wrong data about common memory structure that Windbg can display, and maybe be unable to load your favorite extension.
This leads to a crucial question: how do I know if an executable is x86 or x64? Well there are a few ways to get that information. My favorite is to use the Process Explorer tool from SysInternals ; among a lot of handy column details about each process, you can also add the “Image Type (64 vs 32-bit)” column:
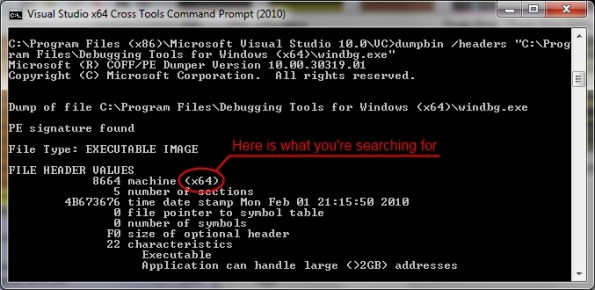
For command-line lovers, any version of Visual Studio, or even the Windows SDK offer a small utility named “DumpBin.exe”. Just start a command line and type “DumpBin /headers <path to your executable of dll>”, you should ends up with something like this:
Quite simple, right? DumpBin can also give you lots of useful information about anything that can be executed on a Windows system, but let’s keep it for another post!

